Before adding captions or text to your generated videos, you’ll need to create a Text Style — this defines how your text looks and where it appears on the video.
Step 1: Open the Text Style Editor
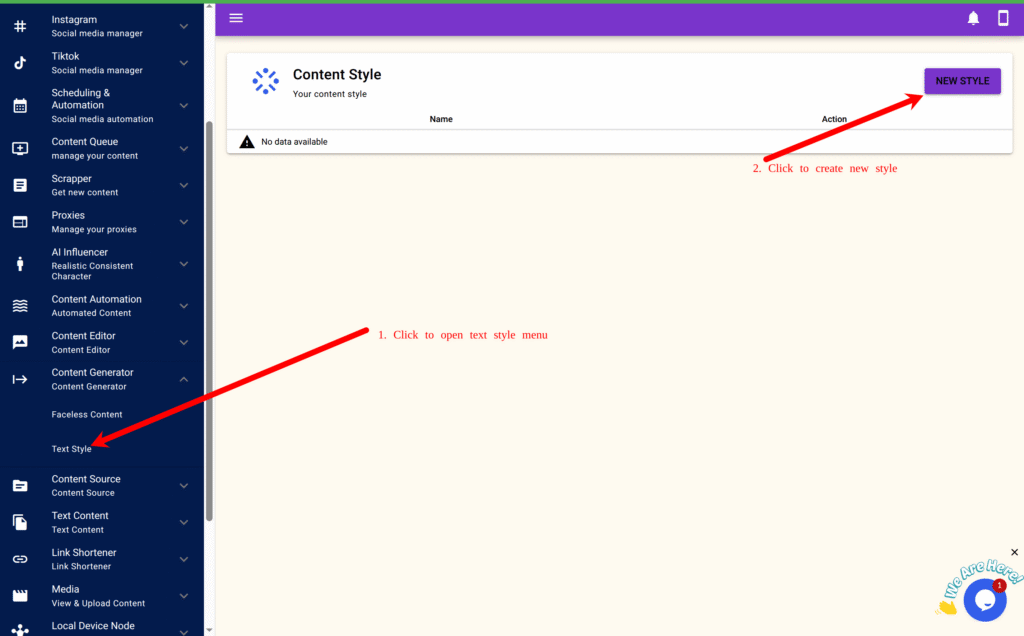
- From the main menu, click Content Generator → Text Style.
- Click the New Style button to create a new text style.
- In the Name field, enter something descriptive — for example:
My First Text Style
Step 2: Customize Your Text Appearance
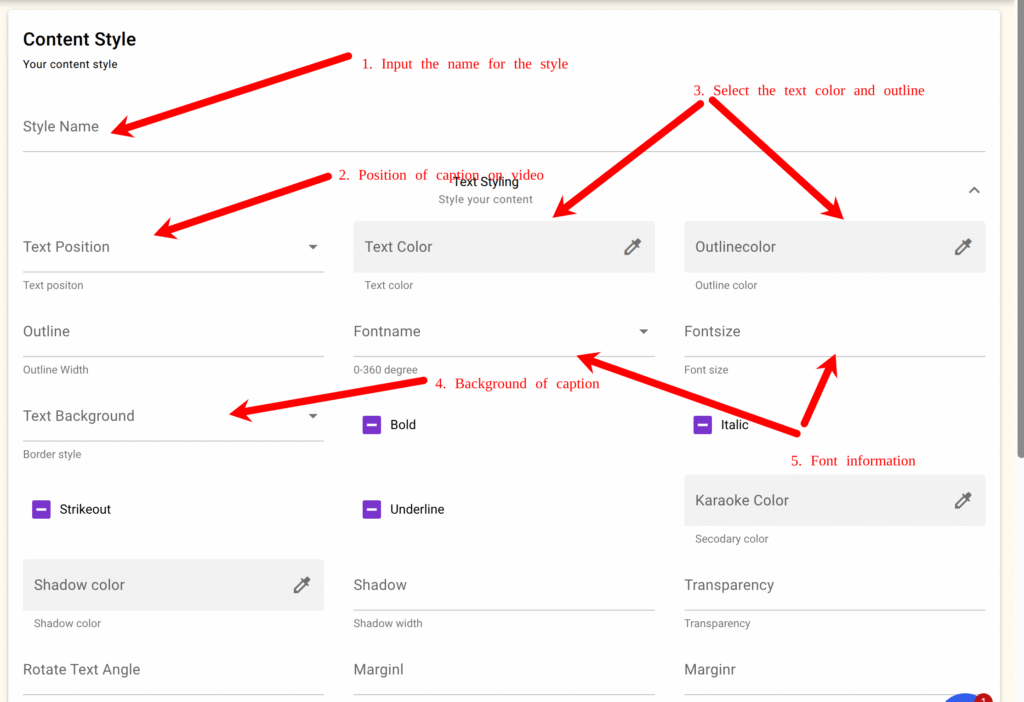
Click the Text Style to expand and view all available options.
Recommended Settings (for social media-style captions):
- Text Color:
Select white (#ffffff) - Position:
Choose Bottom Center — ideal for captions and subtitles. - Font Size:
Enter12(adjust as needed). - Bold: Ticked
- Karoke Color: (This the color used for the classic “social media caption” effect where words highlight as they appear)
Select yellow (#ffff00) - Background (optional):
Choose between:- Full: A solid background strip behind the text.
- Box: Only highlights the text area.
- Font Name:
Pick any available font that fits your style. - Outline / Underline:
Enable if you want to add emphasis or visibility to text.
Step 3: Apply Text Effects
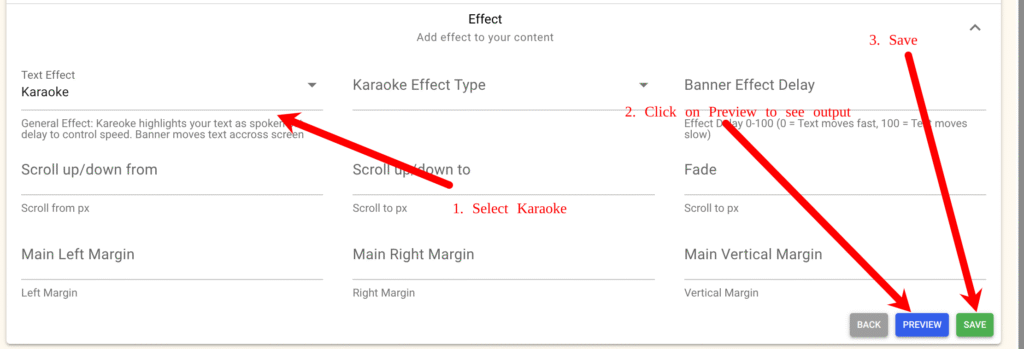
- In the Text Effect dropdown under the Effect, select Karaoke.
This creates the classic “social media caption” effect where words highlight as they appear — great for TikTok-style videos.
Step 4: Preview and Save
- Click Preview to see how your text will look on a sample video.
- Adjust colors, font size, or position until you’re satisfied.
- Once ready, click Save to store your text style for use in future video generations.
✅ Now your text style is ready!
You can use this style in any video generation workflow — for example, to overlay captions or auto-generated quotes on your AI influencer videos.