This is the first and required step for using socialappfarm successfully. I.e
- Importing proxies
- Creating a project so we can get our reporting,
- Create Automation Campaign
- Importing Accounts to our campaign
Chapter 1: Setting Up Your Proxy and Accounts
Since we’ll run many accounts, a proxy is essential for stability and safety.
Recommended Proxy Types
- Best: 4G/5G Mobile Proxy
- Good: ISP or Residential Proxy (cost-effective and reliable)
👉 Ratio: 1 proxy for every 1–3 accounts (max 4).
For 25 accounts, buy around 8 proxies.
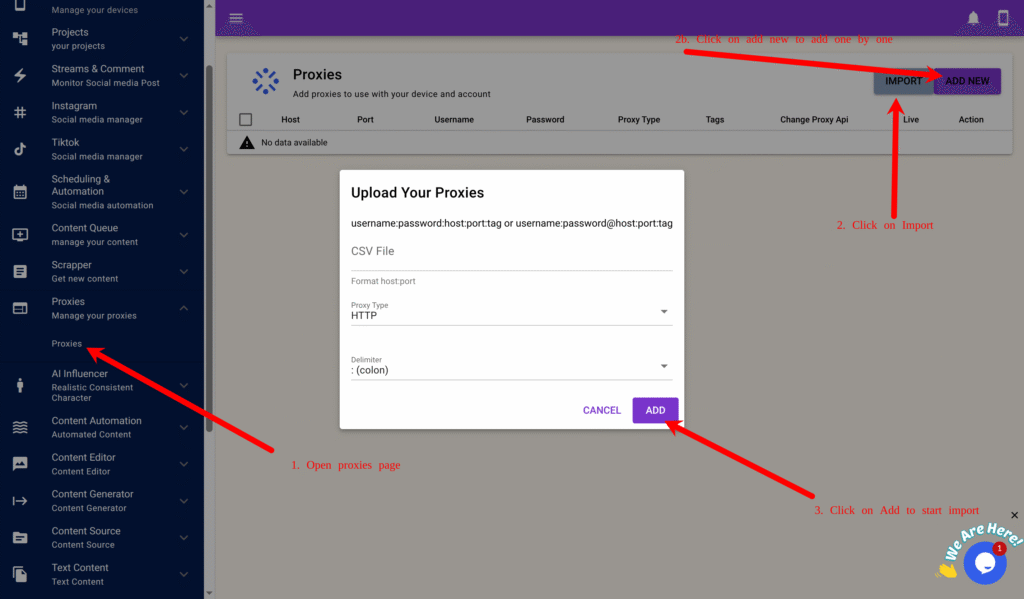
Step 1: Adding or Importing Proxies
- Go to Proxy → Proxy in the main menu.
- Click Add New and fill in the following as an exmample:
Host: 1.1.1.1Port: 8080Username: userPassword: passTag: automationProxy Type: HTTP or Socks5Proxy Change URL: (if you only have one proxy and its supports automatica rotation through url input the url)
- For bulk import, create a proxy
.txtfile:username1:password1:1.1.1.1:8080:automation username2:password2:1.1.1.2:8080:automation - Click Import, select the file, proxy type and click Add.
Chapter 2: Creating Your Project, Campaign, and Backup
To support multiple accounts per device, we’ll back up data to Google Drive.
Step 1: Connecting Google Drive
- Navigate to Technical → Data Backup → Connect Google Drive.
- Log in to your Google account and authorize SocialAppFarm.
- You’ll be redirected back automatically.
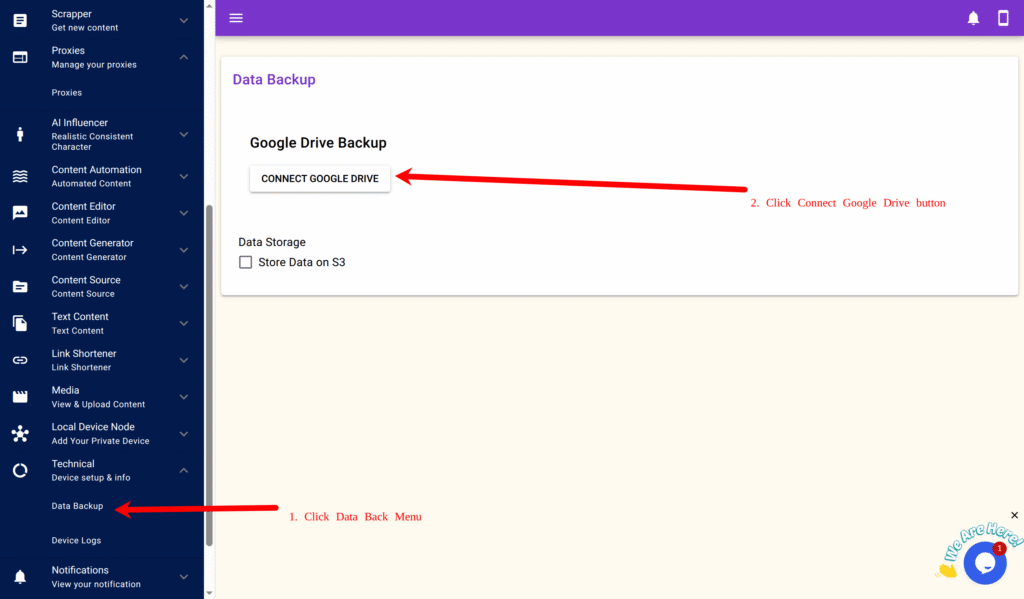
For large-scale setups, you can alternatively use Cloudflare R2, Idrive E2, Amazon S3 or any S3-compatible storage.
Step 2: Creating a Project
- Go to Projects → Projects → Add New.
- Example:
Name: Productivity Organic Social Media GrowthDescription: Growing my social media accounts in the productivity niche.
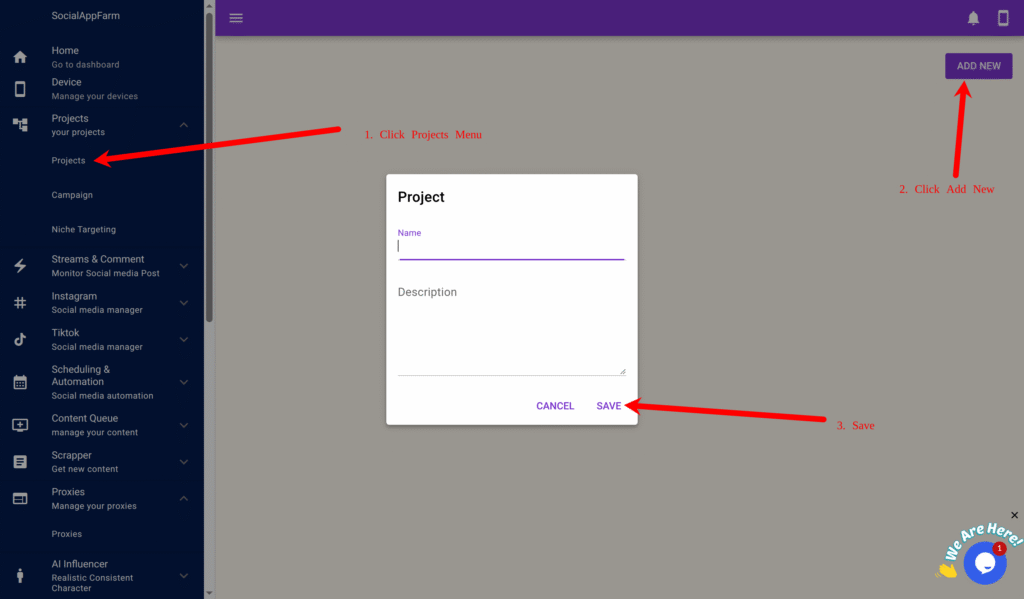
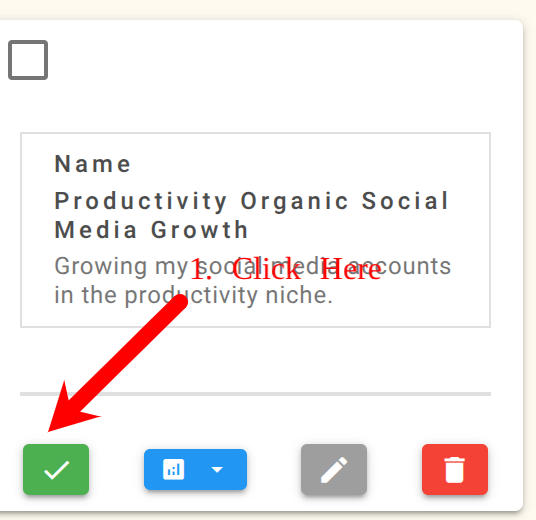
- Click Save, then click the green checkmark to activate the project.
All campaigns and accounts will automatically link to this active project.
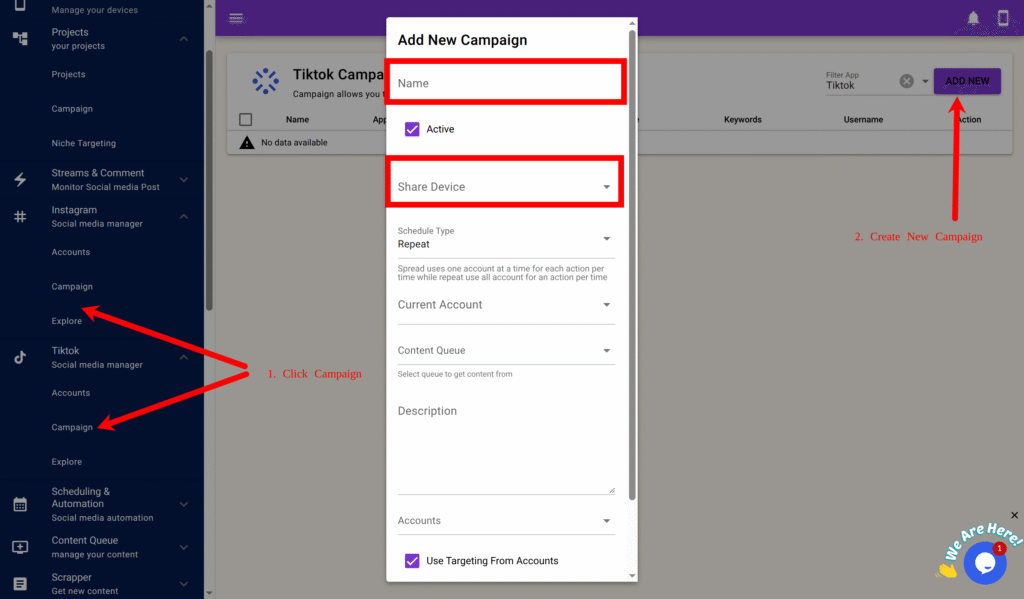
Step 3: Creating a Campaign
For TikTok
- Go to TikTok → Campaign → Add New.
- Example:
-
Name: Productivity TikTok Automation Share Device: Select your TikTok device
-
- Click Save.
For Instagram
- Go to Instagram → Campaign → Add New.
- Example:
Name: Productivity Instagram Automation ShareDevice: Select your Instagram device
- Click Save.
Step 4: Importing Accounts
For both TikTok and Instagram, repeat these steps:
Note: Only username is important when adding or Importing your account but socialappfarm can help you auto login if you include your password, it can also retrieve code from email if your email has imap access and also generate 2fa code if you include your 2fa key.
- On the created campaign, click View Accounts → Import. (You can also add your account ony by one by clicking on Add New and fill in the account info)

- Format your bulk import (CSV or TXT):
username:password:email:emailpassword:biolink:bio:2fakey(Example below)username1::::::username2:pass2:::::2faKey2
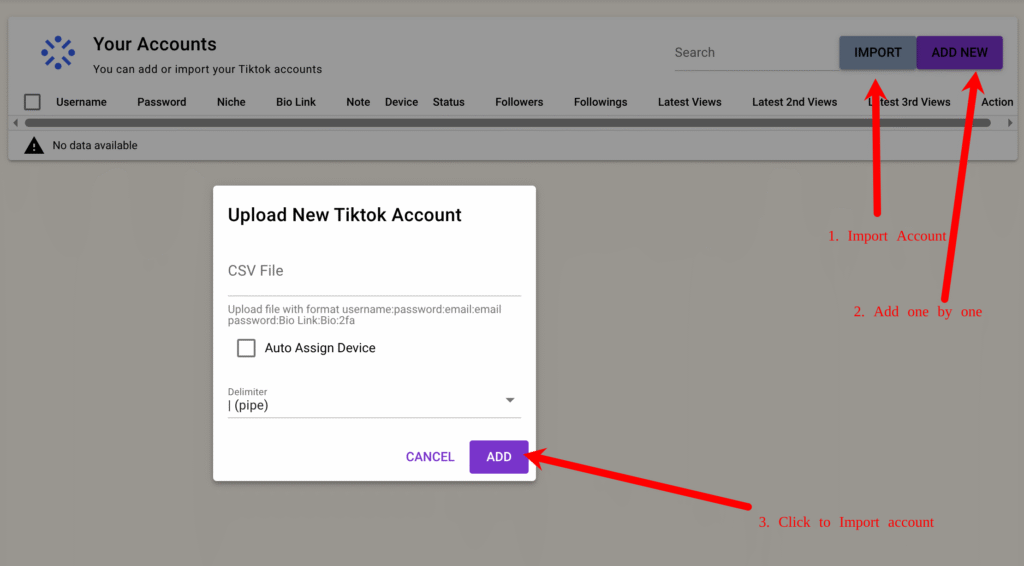
- Upload and import.
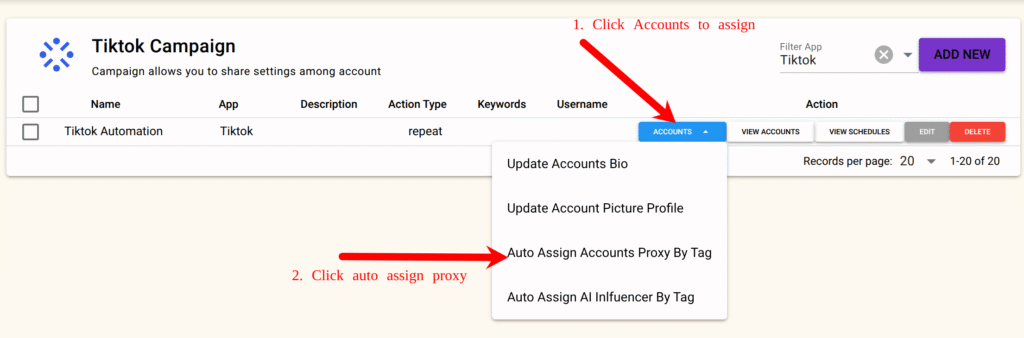
- Then go to the Campaign again and click Accounts → Auto Assign by Proxy Tag, input your tag (e.g.,
automation), and confirm.
Proxies will now be evenly distributed to all accounts.
Step 5: Logging Into Accounts
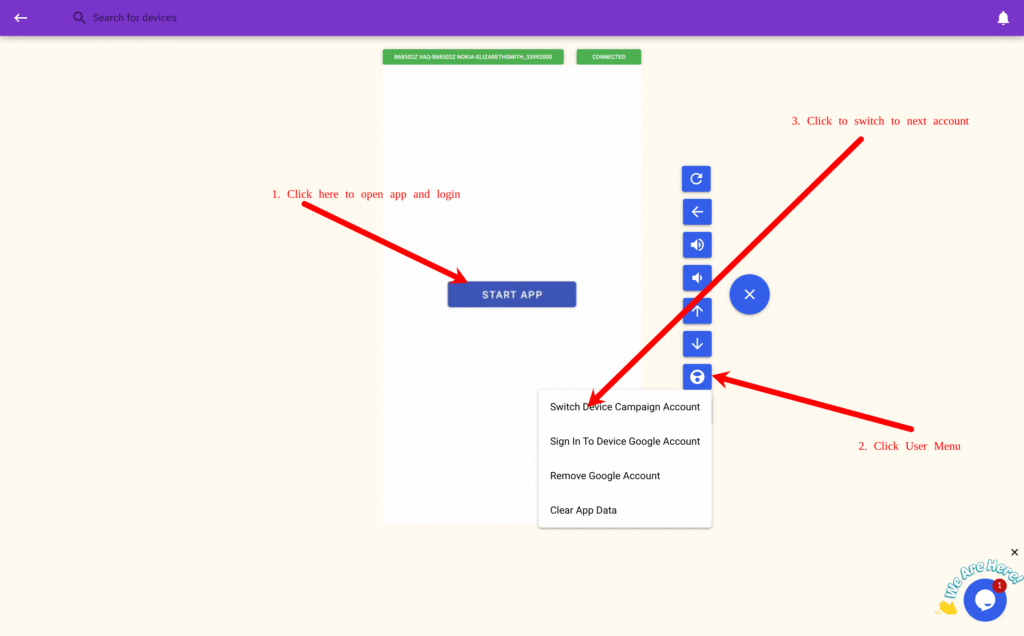
- Open your campaign and click Connect Device
- (Important : Connect from the campaign page, not the device list).

- On the device stream page, click Start App, then log in manually.
- Click the “+” icon → User Menu → Switch Device Campaign Account, select the next account, and repeat the login.
💡 Note: If you import usernames and passwords, SocialAppFarm will attempt auto-login during automation. If 2FA keys are imported, it will automatically handle two-factor authentication as well and email codes for imap enabled email
Leave a Reply